Wednesday, January 31, 2007

I can sit down now!


I hung one of the doors and spent the remainder of my time this week installing the interior in my truck.


The driver-side door is assembled, but I will have to hang it next week since I ran out of time today.


But just a peek at the finished side is really very exciting. Doesn't it look great?

Wednesday, January 24, 2007

Roof over my head


Using 3M spray adhesive, I installed the headliner and installed the cap onto the hard top. This was a physically difficult task and required Brad's help to complete, but it is so great to see it on finally. The interior has that new car smell now.


It looks like a Land Cruiser all of a sudden.


Next week, I'll assemble the other door and install them both.

Wednesday, January 17, 2007

Drill holes? In my truck? Really?


I installed the glass in the hatch and all but one of the window of the hard top. The guys showed me how to do it and after watching, I was able to do it without too much difficulty. Soapy water and some string ends up being at the center of the process, and it's tricky but not too hard. The hard part is the beating your hands take. I am going to be sore for a week.


I installed the reverse light, one of the most hard-to-find parts on the 1973 model since they only used this particular light for this one year. It's glass and heavy.

I also installed the rear badges which were difficult since I had to drill holes into the quarter panel to put them in. Nothing like drilling four holes in the side of a newly painted truck.


The passenger side window is the last piece of glass that I have to set in until we install the windshield.

Also visible are the side marker lights that I put in today. The holes for the body of the light were stamped out in the new quarter panel that we installed, but I had to drill the holes for the mounting screws. More holes in the side of my truck, but I did it without making any mistakes and it looks great.

Tuesday, January 2, 2007

Tired


I installed the header over the rear hatch, the tail lights and the spare tire gate. I need to do some wiring before connecting the tail lights to the wiring harness.


The striker for the spare tire gate had to be relocated after we discovered that Cool Cruisers' rear channel had the nuts misaligned after installing it, but Trevor moved the mounting holes and nuts long ago, and it all works great.


I started assembly on the doors and got the driver's side door put together before the shop closed up. Next will be gluing the weather stripping and then I can hang them.

Tuesday, December 26, 2006

Taking control


It's the day after Christmas and I wanted to work on assembling my truck. The bulk of the work to put this back together will be completed by me, something that I am looking forward to. Thankfully, they guys will still help when I need advice or an extra set of hands.

It being the day after Christmas, no one was here but Jim and I, which was fun. We got to talk and work side by side as he did some work on his pickup while I started to put this back together.


After so many years of imagining my truck repainted and looking new, it was so good to see this corner of it come together. I have stared at this photo many times today.


After getting the front clip assembled as much as I could until I get the windshield latches painted, I turned my attention to the back where I installed the rear reflectors, the spare tire gate hinges, the license plate frame and light and the bumperettes.

I still can't seem to find four 6mm machine screws with a pan head that are long enough and have the correct yellow zinc plating to match the rest, so I am stuck with the black oxide ones for now.

I worked for most of the day and am really tired. I think Jim wanted to go home a little earlier than he ended up being able to, but he could tell I was having fun and I appreciate that.

Tuesday, December 19, 2006

The bezel


The headlight bezel, the trademark part of the FJ40 for its 24 years of production, was so fun to see painted back to Cygnus White and ready to install. The rear hatch, upon which it is sitting, turned out very well too.


The rest of the Cygnus White that they mixed up went to the hard top cap and it looks amazing. The floatable seam sealer was a good idea and made the drip rail look and function great.


All of the parts that were painted pewter look great. The jump seats look even better. I am so glad that I took them to be sand blasted.

The windshield hooks didn't get painted with the other parts, probably because they had been painted beige at some point and the guys were unsure if they were supposed to be pewter or beige. They'll paint them as they put a second coat on the jump seats.

Tuesday, December 5, 2006

Hints of what is to come


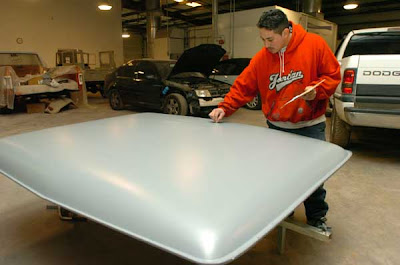
Hector filled and gel coated the cap after filling the gutter of the rain rail with floatable seam sealer. Here, Anthony fills in some scratches before sanding some more and then priming before it gets painted tomorrow.

I wish that they had saved the rivet heads that hold the piece of metal that sits along the top edge of the windshield frame. They were sanded off and filled in around so they are no longer visible. All the rivets, spot welds and screws that show on this make up a part of this particular vehicle's charm. But, I didn't tell them to save them and they are used to making everything look as good as they can, and that means make everything smooth and shiny.


Next are all the parts like the spare tire rack, rear heater, seat backs, jump seats, side-view mirror arms, console, ash tray, glove box door, hood and windshield latches, and the rear bumperettes. These parts, along with the front bumper, which I received already painted the correct color from Toyota, are painted a greenish pewter color.


I placed the hard top side panels loosely where they go just to get them out of the way and to keep them from being scratched, but it's nice to see the truck appear a bit more assembled.